Wednesday, 10 June 2020

How To Automatically Translate Any Android App Into Any Language

There is the number of applications which are not having the features of translating apps to your favorite languages. This makes it difficult for the users to translate apps into their native language. Today, I am going to tell you about an application which will help you to Automatically Translate Any Android App into Any Language.
Nowadays there are around hundreds of application on play store which is having the feature of translate but some applications don't have this features. This is just because they don't have proper developers or sometimes translators.
There is an application launched by Akhil Kedia from XDA Developer which made it possible for all the users to translate the application to any language you need. This is something which everyone needs it.
Akhil Kedia built an Xposed module in which users can easily change the language of any application to whichever they like or love. Personally, we all love English language but there are peoples in many parts of the world they are suitable for other languages.
Automatically Translate Any Android App into Any Language

Automatically Translate Any Android App into Any Language

The best part about this Xposed Module is that it translates the application to any language whichever you like and there are around many languages which you can try it. The other best part about this application is that the user interface which is amazing.
In an Android application, the best thing is the user interface. This is something which helps users to download the module or application to run again and again. There are about many settings which can be changed from the application.
The setup process is a bit different from other applications but if you will look at the application you will definitely love it. Just because of too many settings and features available in the application and you can turn it to any language without any crashing issues of the application.

Requirements:

  • Rooted Android Phone
  • Xposed Framework installed on your phone.
  • Android 5.0 or higher.
  • Unknown Source enabled (You might be knowing it)
How to Automatically Translate Any Android App into Any Language
  • Download the module called as All Trans from here: Download
Automatically Translate Any Android App
  • Now, after installation, it will ask you to reboot your phone to activate the module
  • Now, you need to get the API Key to get it you need to sign up with Yandex first so sign up: Yandex Sign up
Automatically Translate Any Android App
  • Then after sign up you will get the API key just enter the API key in the All-Trans application.
Automatically Translate Any Android App
  • Open All Trans Application and the swipe right to Global Settings.
Automatically Translate Any Android App
  • Click on Enter Yandex Subscription key and then enter your key.
Automatically Translate Any Android App
  • In Global Settings click on Translate from and select the Language the application is already in. (Eg: English)
Automatically Translate Any Android App
  • Now, click on translate to and select your favorite language. This will change the language.
Automatically Translate Any Android App
  • Swipe left and select the applications which you need to translate and done.
Automatically Translate Any Android App
  • After selecting just open the application and the language is translated automatically.
Automatically Translate Any Android App

Final Words:

This is the best and easy way to Automatically Translate Any Android App into Any Language. I hope you love this article.Share this article with your friends and keep visiting for more tips and tricks like this and I will meet you in the next one.
Stay Updated Tune IemHacker

More articles


How To Change Facebook’s Default Theme To Any Color You Want

Change Facebook Theme Using Chrome Extension

How To Change Facebook's Default Theme To Any Color You Want

We are going to share an interesting trick on changing your Facebook default theme. You just need a Google Chrome extension to perform this trick. If you are among me who feels very fatigued with the look of Facebook's by default theme then this is a must-see post because you will find out the easiest trick to make your facebook more attractive than before.

Facebook is a social networking site which empowers people to connect with friends and people around. That's how Facebook is habitually introduced. However, Facebook is beyond the need of being introduced as almost everyone is on it.
   A couple of Days ago I was simply Surfing Google Chrome website and I somehow stumbled upon a Chrome Extension. Yes, a Chrome extension that will give your Facebook a Whole new look. I was apprehensive to try it, So I just installed it and checked my facebook. I was astonished to see my facebook homepage have all new look. I found it refreshing and decided to write steps on How to Change Facebook Themes using Chrome Extension.

How To Change Facebook's Default Theme To Any Color You Want

If You are among me who feels very fatigued with the look of Facebook's by default theme then this is a must-see post, Because you will find out the easiest trick to make your facebook more attractive than before. Simply follow the steps to know about it.

How to Change Facebook Theme Using Chrome Extension

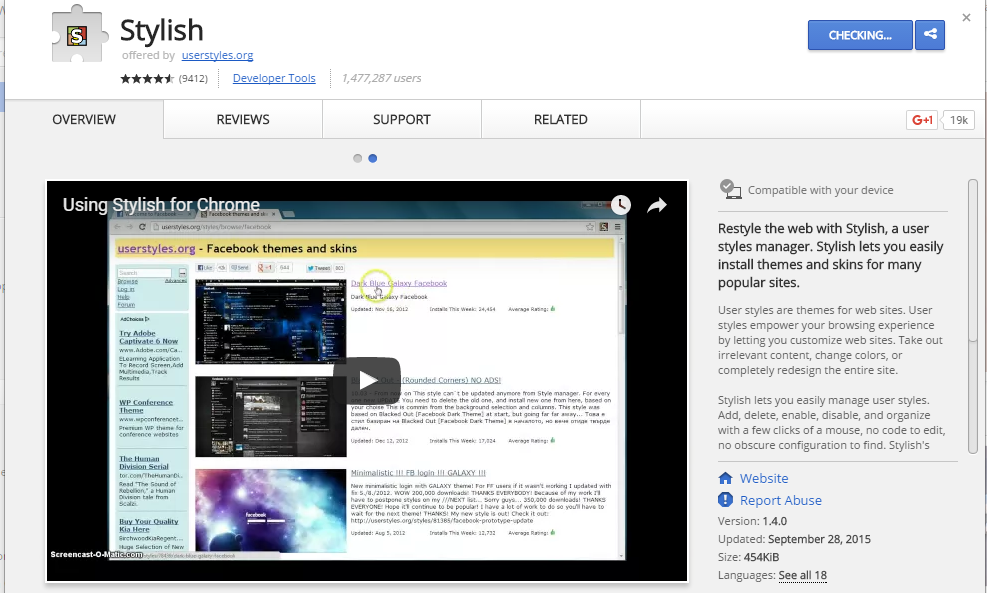
Step 1. Install Stylish for Chrome from the Chrome Web Store. It will take hardly a minute to get installed in your Chrome browser.
Change Facebook Theme Using Chrome Extension
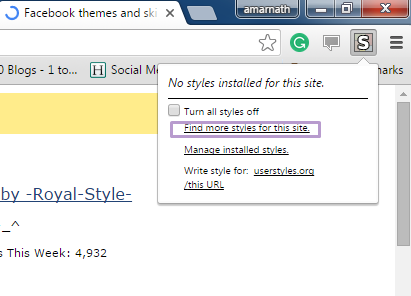
Step 2. Navigate to Facebook.com and click on the S button. Click on Find Styles for this Site to open a new tab with free themes to use for Facebook. Most of the themes are free and attractive too you can easily browse over the full website to discover your favorite theme.
Change Facebook Theme Using Chrome Extension
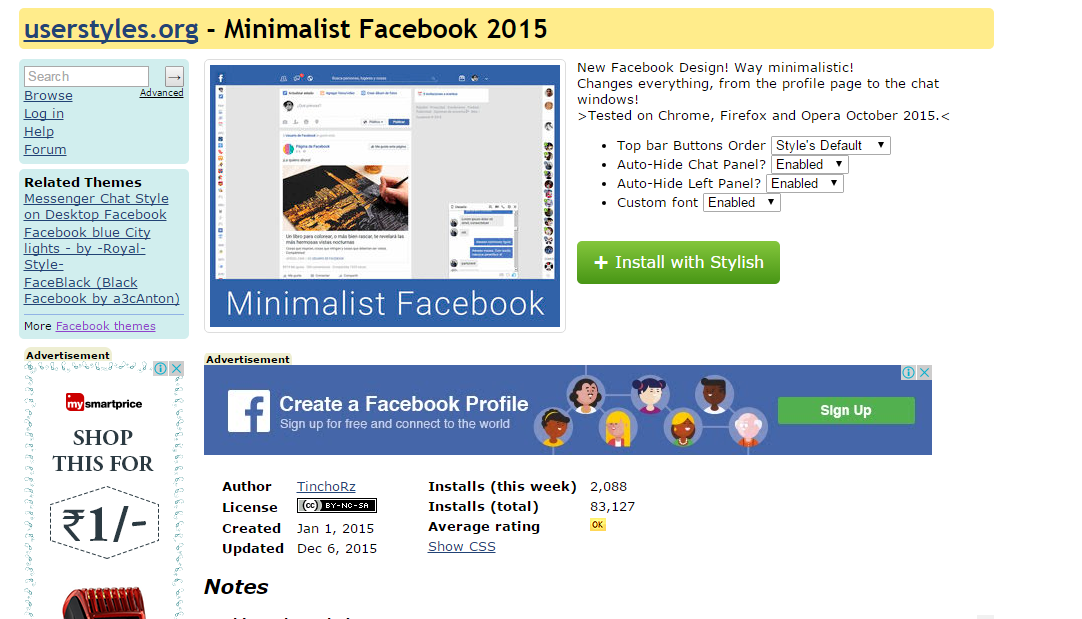
Step 3. Now You will be redirected towards https://userstyles.org Guess what! This site contains huge numbers of Facebook themes, One thing is for sure that you will be confused in-between what to select and which one to skip. Select any them and click on it. Now you will be given a full preview of your selected theme.
Change Facebook Theme Using Chrome Extension
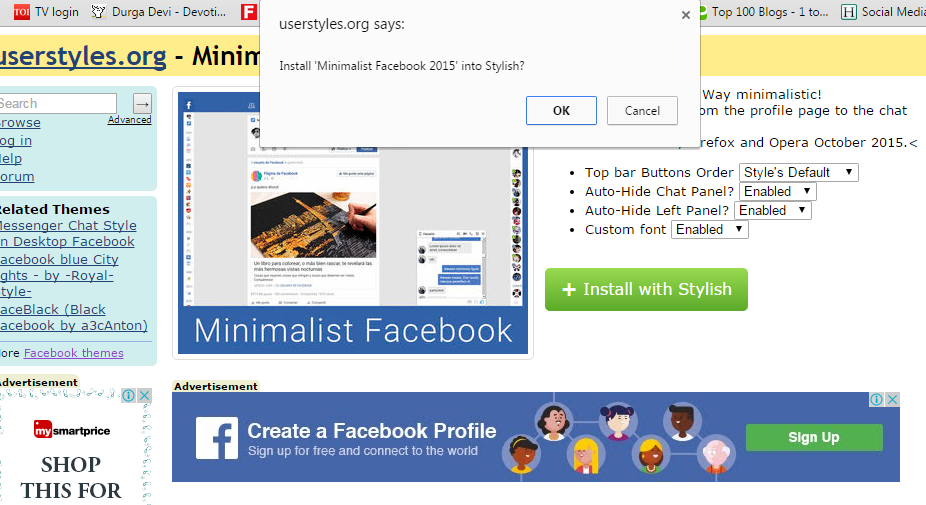
Step 4. If everything is fine in the previewed theme, click on Install with Stylish button at the top right corner of the page. It will take few seconds or minutes depends on your theme size to be installed in Stylish Extension, once installed you will be notified with a success message.
Change Facebook Theme Using Chrome Extension
Step 5. Now whenever you open Facebook, it will show the theme that you have installed with Stylish instead of the boring old blue theme.
Change Facebook Theme Using Chrome Extension
Related links

How To Insert Data Into Database | Tutorial 3


Welcome to my another tutorial of PHP and MYSQL. In the previous tutorial I've briefly discussed How to make a PHP file and How to save the PHP file in the root directory of the server. How to run PHP script over the Web Browser etc.

Now in this tutorial I've discussed about inserting data into database by getting the values from user with the help of HTML form. One thing should be remembered that getting a values from users by HTML form is the only way to get values from users in PHP.

How To Insert Data into Database

Step 1:

Open your text editor and create HTML form. 

Step 2:

Make a database connection in PHP.

Step 3:

Write an INSERT query for the sake of insertion data into database like INSERT INTO table_Name(table_Attribute1, table_Attribute2....) VALUES('1', 'Alex'...); etc. Now watch the video to make a better understanding the concept of insertion.